Wells Cathedral
Jesse Window Database
Pierre Smars, 27 January 2003
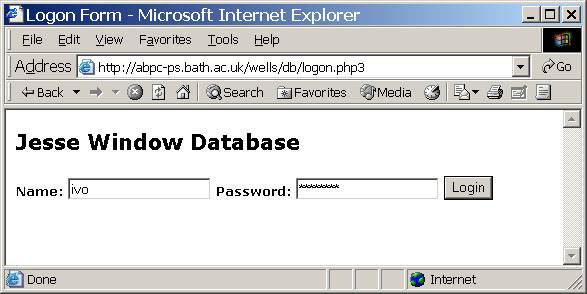
Figure 1: Logon window: http://staff.bath.ac.uk/absps/wells/db
When user name and password are authentified, you are redirected to the main database window (figure 2). This window is divided in 2 frames. The left one (A), now empty, will contain information related to the glass units (figure 10). The right frame (B) contain a VRML window (a) (if you don't see it, it means that Cortona VRML client has not been installed properly) and different controls (items b to f on figure 2) to be discussed below.
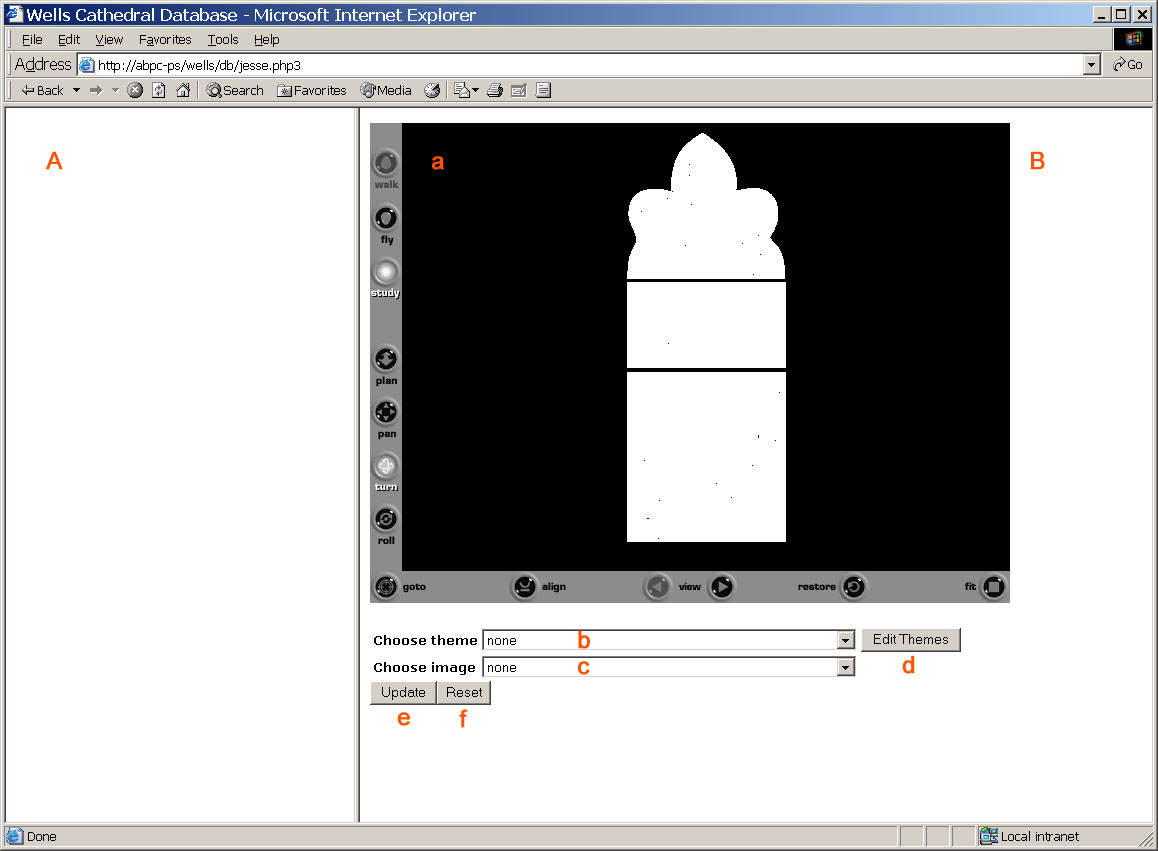
Figure 2: Opening screen
Before using the database, some settings of the cortona VRML client have to be controlled. With the mouse above the VRML window, click on the right button. A window menu (figure 3) should appear. Choose Preferences....

Figure 3: Cortona VRML client settings
Another window should appear. Select the Renderer tab (figure 4). Choose the DirectX Renderer and, in the options, verify that the textures are optimised for quality. Click on OK to exit the window and apply the new settings. These adjustments are necessary to achieve a correct rendering of the model.
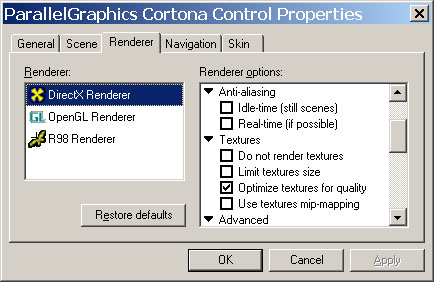
Figure 4: Cortona VRML client settings
It is also necessary to adjust settings in Microsoft Internet Explorer. On the menu bar of the browser, choose Tools, click on Internet Options.... A window appears. The General tab should be selected. In the Temporary Internet Files, choose Settings.... You should now see a window similar to the figure 5 below. Verify that Check for newer versions of stored pages is set to Every visit to the page (you may also want to return to another setting when you don't work with the Jesse database). This setting is necessary to insure that, when something is updated in the database requiring a refresh of the model, the information is taken from the internet and not from a temporary file stored locally. Click on OK to update the settings and exit both windows.
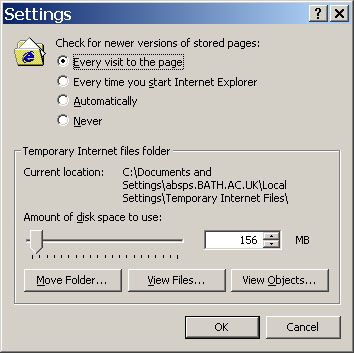
Figure 5: Microsoft Internet Explorer Settings
At this stage, only the outline of the window is visible. An image of the leadnet can be projected on the model. Choose the lead image from the list of available images (figure 2.c, figure 6). Then press on the Update button (figure 2.e) to perform the projection.

Figure 6: Choosing an image
Themes can be choosen in the same way as images (figure 2.b, figure 7). Each glass unit is then coloured according to its layer in the chosen theme (figure 8). For instance, all the damaged glass could be coloured in red and the undamaged in blue.
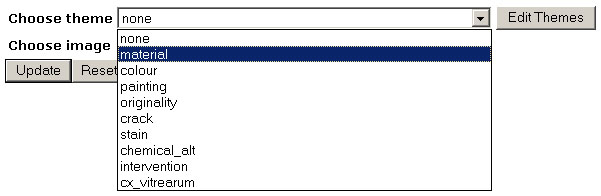
Figure 7: Choosing a theme

Figure 8: The model rendered with an image (of the leadnet) and with a theme (with the colours corresponding to the different layers)
Pre-defined views of the model can be selected in turn using the view buttons (figure 9.a-b) on the VRML frame. Other controls of the VRML window (plan, pan...) are explained in the Cortona VRML client user guide.
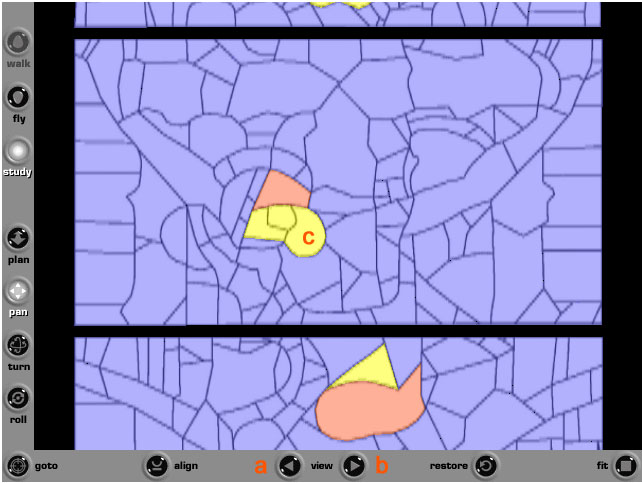
Figure 9: Detail view of the model
If the user click on one glass unit of the model (figure 9.c), an element editor will open in the first frame of the general window (figure 2.A, figure 10). All the themes are listed and for each of them, the layer currently selected is shown on the right-hand side. The current selection can be edited by simply opening the pop-down menu and choosing the appropriate layer from a list of the existing layers (figure 11).
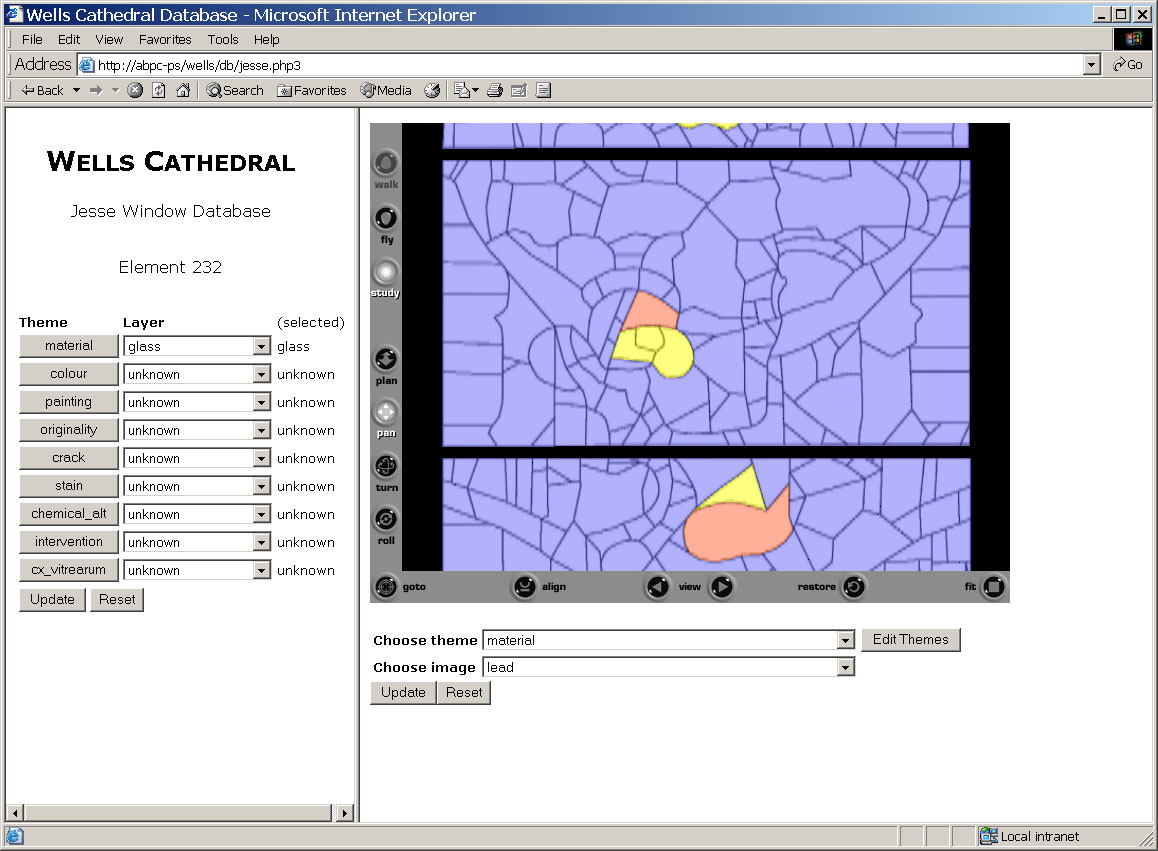
Figure 10: Rendered model with the element frame allowing to edit the data related to a specific glass unit.
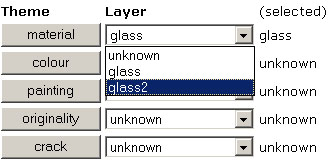
Figure 11: Choosing a layer
Again, the Update button has to be pressed to see the changes happen. And, in order to show the new changes on the VRML window, the Update button of the right frame (figure 2.e) has to be pressed as well.
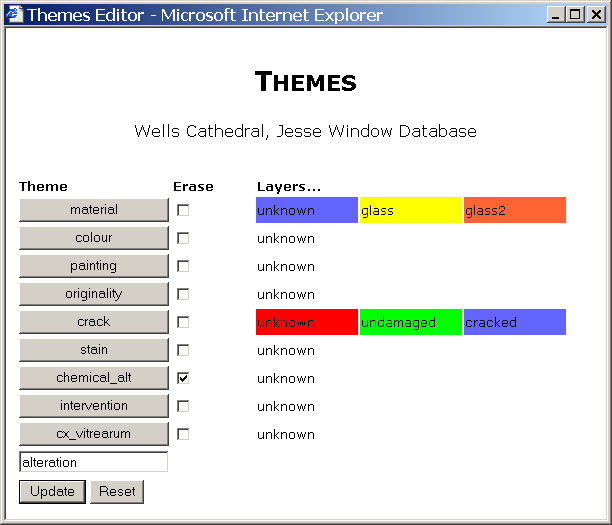
Figure 12: Edit Theme Window
To edit layers of a specific theme, one has to open a Theme Editor window (figure 13) by pressing one of the theme's buttons of the Element Editor window (figure 10) or of the Themes Editor window (figure 12). In the example given, the layer undamaged will be erased and a new layer intact will be created. Note that the unknown layer cannot be erased. When a layer is erased, the corresponding glass units are assigned to the unknown layer.
| Colour | R | G | B |
| red | 255 | 0 | 0 |
| green | 0 | 255 | 0 |
| blue | 0 | 0 | 255 |
| yellow | 255 | 255 | 0 |
| orange | 255 | 128 | 0 |
| grey | 128 | 128 | 128 |
Table 1: Example of possible colours and corresponding RGB values.
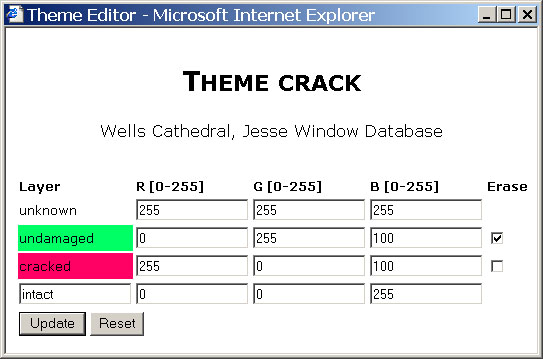
Figure 13: Edit Layer Window